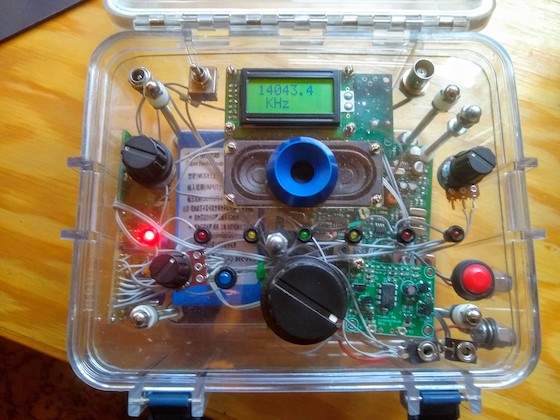
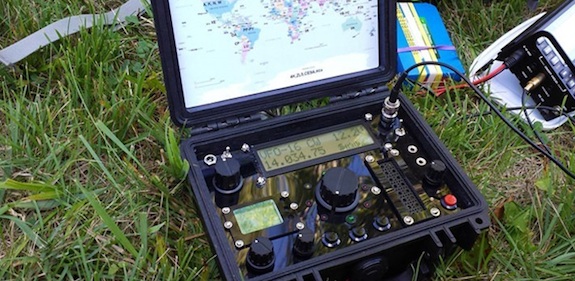
This is a 20-meter QRP radio. It’s an MFJ Cub with all sorts of goodies including an LED zero-beat indicator – the colored row of lights in the center – and a built-in electrostatic touch keyer. Look through the plastic in the right lower corner, you’ll see the acorn nuts on the side of the box that you touch to send the dihs and dahs. Thanks Hanz! W1JSB
A little over two years ago I saw the coolest radio ever. It was a small QRP rig in a clear plastic water-resistant box built by Hanz Busch, W1JSB. I wrote about the experience of seeing this magical radio and you can read my previous post here. Here’s a video of what I saw:
I was INSTANTLY HOOKED. I had to have one of these super-cool one-of-a-kind QRP radios. I was intrigued by the touch keyer that senses the electric field around our bodies.
I had never built a kit radio nor soldered a resistor to a circuit board. As a master plumber, I’d soldered thousands of copper fittings with an acetylene torch, but I thought that would be a little overkill for an electronics project.
I love to hike and spend time outdoors and I discovered that several of my club members blended hiking with amateur radio. Some of them did Summits on the Air and others just did casual low-impact hiking.
One thing I knew for sure is that radios and water don’t mix well so if I wanted to do outdoor radio and not ruin my equipment I had better figure out a way to protect my investment. The water-resistant clear box I saw seemed to be just the ticket.
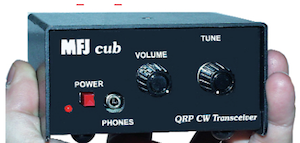
Here is what the Cub looks like if you just go with the kit from MFJ. It’s small and compact, but it’s not too sexy and doesn’t have any extra stuff. Photo credit: MFJ Enterprises
My CW and outdoor-radio mentor Jim Cluett – W1PID suggested that I buy the MFJ Cub 20-meter transceiver as that band is very reliable in daylight hours.
I like to do outdoor radio in daylight hours rather than doing radio at night from a tent. You may enjoy doing radio at night, so pick whatever band favors your optimal time of operation.
Plus, the MFJ Cub is a solid little radio and the kit is not too tough for a beginner.
I placed my order, it arrived in no time and Hanz came over to my house to tutor me about how to build a radio in a box. We had two work sessions in February and March of 2013, but after that the project languished as Hanz got busy.
Fast forward two years!
Two weeks ago at the beginning of March, Hanz and I got together to get the radio finished. Last weekend Hanz started to work on the clear Lexan panel where all the controls go.
Last night I went to Hanz’s house and started to assemble the Son of Zerobeat kit.
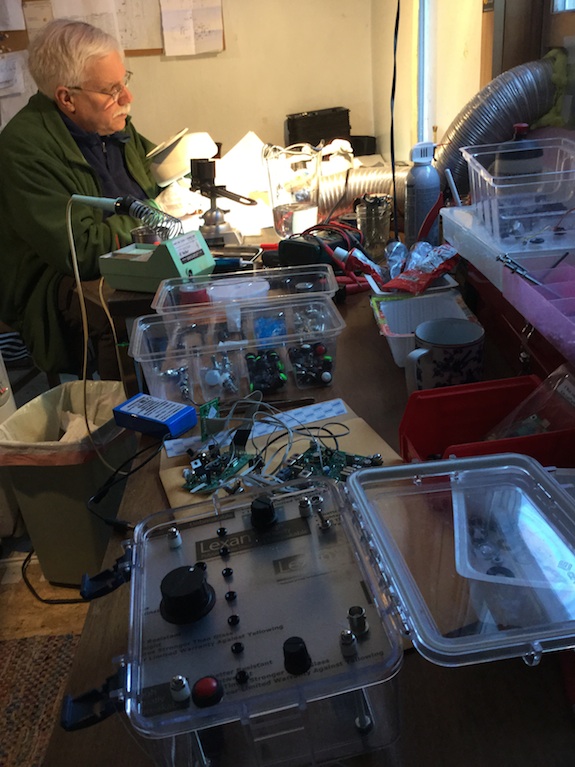
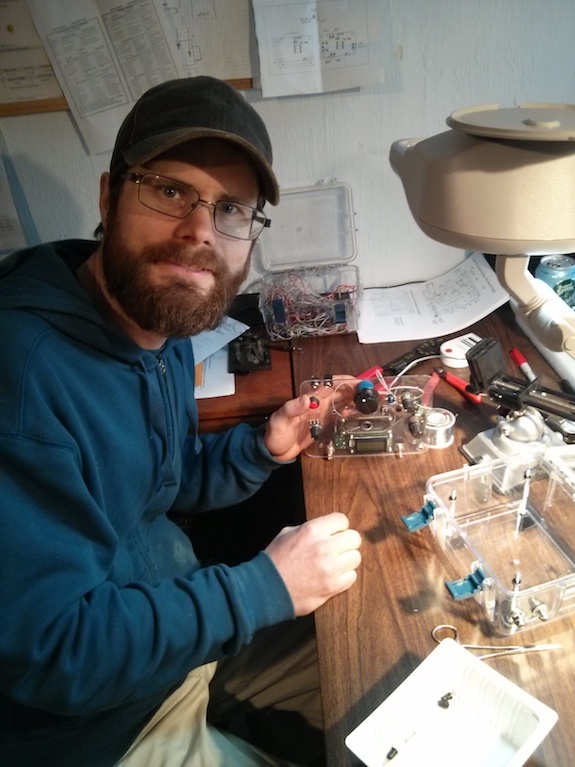
Here I am at Hanz’s great workshop soldering away. I sure enjoy putting together these circuit boards! You can see the clear water-resistant box in the bottom of the photo that the radio will be in. Photo credit: Hanz Busch – W1JSB
I had a BLAST soldering and almost made a mistake after a couple of hours. A small blue round thing that looks like a farmer’s grain silo had to be soldered in a certain way as it was polarized. I failed to see that in the great instructions, but luckily I had the correct orientation!
This radio is the MFJ Cub on steroids and human growth hormones. The kit from MFJ just has two knobs and the power, key and phone input jacks. My radio will have that and much more.
It’s going to have an LCD digital frequency readout, it’s got the Zerobeat kit so you know when you’re right on frequency, it’s got a built-in high-performance lithium-ion battery, and an electronic touch keyer! All you have to do is open the lid, attach the antenna and turn it on to operate.
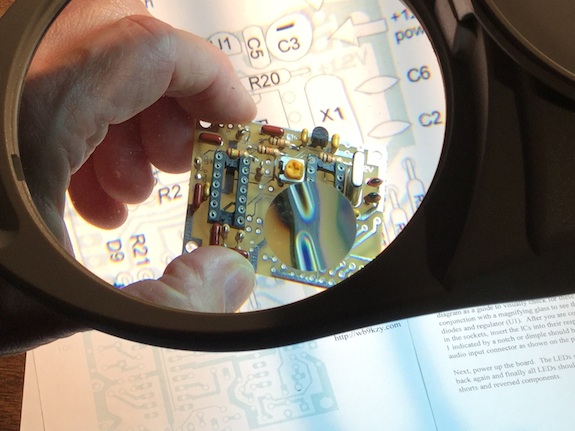
Here is the partially complete Zerobeat circuit board. Only a few more parts to go. The LEDs will not be on the board but up in the control panel of the radio. Photo idea Tim Carter – Photo credit: Hanz Busch – W1JSB
Hanz is in the business of building even better radios in a box. He now uses the super durable Pelican boxes and installs an HB-1B quad-band radio in the box. It has all the stuff my radio has and MORE. You can ORDER Hanz’s radios by simply CLICKING HERE.
Here’s his latest version. His craftsmanship is SUPERB:
This is a quad-band QRP radio in a waterproof Pelican box. CLICK the image to discover MORE. Photo credit: Hanz Busch – W1JSB
UPDATE – March 21, 2015:
Yesterday afternoon, Hanz and I continued to work on the project. I was hoping to get it finished, but boy it’s a lot of work.
Here is Hanz working on the control panel. He’s a wizard and his attention to detail is stellar. CLICK this photo to see Hanz’s radios! Photo credit: Tim Carter – W3ATB
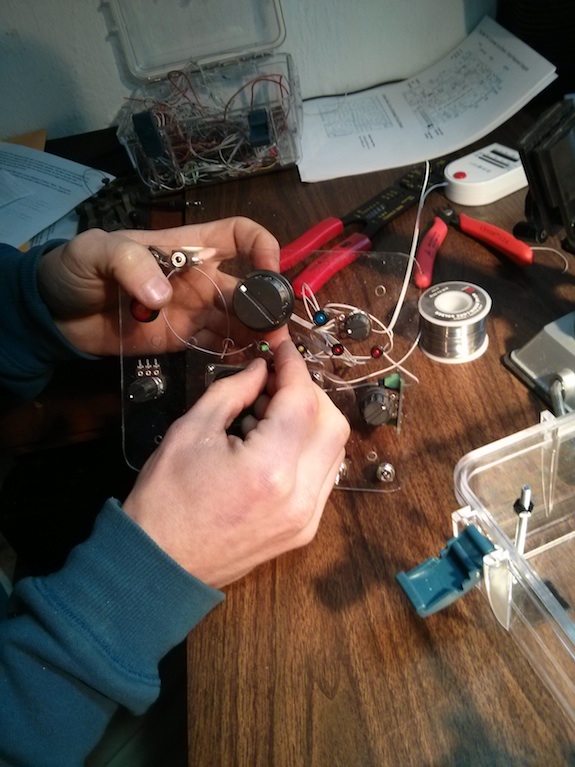
I spent 40 minutes completing the construction of the Son of Zerobeat circuit board while Hanz worked diligently on completing the clear panel that has all the control knobs, LEDs, LCD frequency display, switches, and input jacks.
After I finished the Son of Zerobeat board, Hanz then had me wire up all of the LEDs for the board. Hanz feels the radio looks better if you use small round LEDs and space them out on the panel. I have to agree. You can see them below in the photos.
Hanz is installing a LED into the clear Lexan control panel. That’s what’s so cool about this radio is that once complete, you can see all the internal parts! Photo credit: Tim Carter – W3ATB
It took a solid 90 minutes to daisy chain the positive leads of the LEDs and then solder on the negative feed wires to each LED. I really enjoyed doing it, even tinning the small tiny metal pins of the LEDs!
We hope to complete the project on Sunday, March 22, 2015. All that’s left to do is just make all the connections from the radio and other circuit boards to the control panel components.
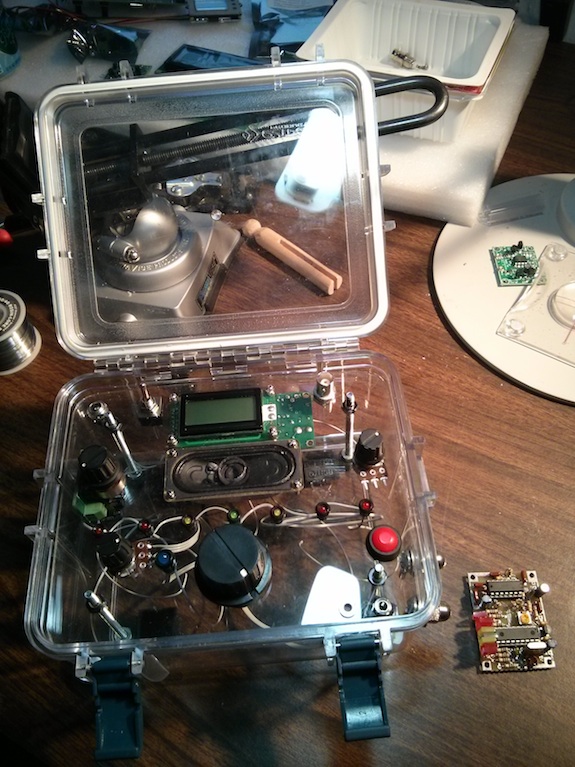
This is what the radio looked like on March 20, 2015 as I walked out Hanz’s door. You can see the Son of Zerobeat board in the lower right corner. Just to the left of it are the acorn nuts on the outside of the box that are connected to the electronic touch keyer. Remember, all you need to operate this rig is an antenna! Everything else is built into the box! I know you want one of these bad boys. Photo credit: Tim Carter – W3ATB