Portable Antenna Mast – Many Types
I’ve been doing public service amateur radio work since June of 2011. Frequently we need to erect a stable 2-meter antenna to get great simplex coverage at some of the events we work.
A few years ago I was introduced to the durable and versatile military surplus aluminum tubing that connects together with male / female ends. There’s even an interlocking tab so the tubes don’t spin.
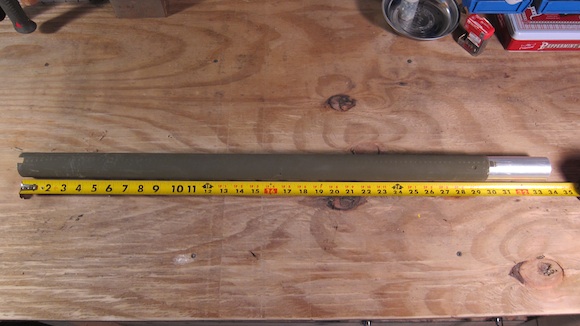
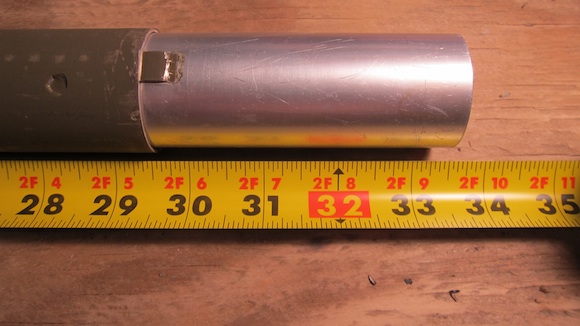
Here’s a section of the aluminum tubing. Each piece has an effective length of 29.5 inches. It’s 1 and 5/8-inch OD. The male end extends into the female end of the next piece 4 inches. Photo credit: Tim Carter – W3ATB
At one event I saw a fellow ham use a patio umbrella stand to support the mast tubing. To ensure the mast didn’t fall over, the base plate of the umbrella stand was held to the ground by the tire of the ham’s truck.
I thought the umbrella stand design could be improved upon so I talked one day with a fellow ham, John Haven, KC1AAG. I drew up a rough sketch on a piece of cardboard to show John and he thought about how to add the bolts and make the base as light as possible using a ring of metal instead of a solid plate of steel.
The steel ring was a brilliant idea. My guess is the entire support weighs less than 20 pounds. You won’t be taking this backpacking, but for a field setup where you operate in the vicinity of your car or truck, it’s a good thing to consider. I think the photos do a good job of explaining what’s going on.
Be sure to watch the video below of one of these masts being erected by my fellow club members.

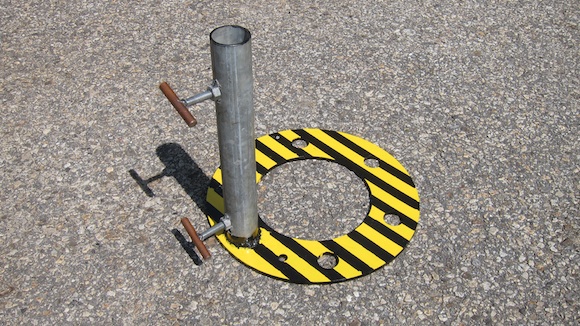
Here’s the completed antenna mast support. The yellow and black iron ring is 17 inches in diameter and 3/8-inch thick steel. The galvanized pipe is 17 inches tall and has an ID of 2 inches. Holes were drilled into the side of the pipe so the bolts can secure the mast to eliminate wobble. It’s one-half-inch bolt material with a nut welded to the pipe. A small piece of grounding rod is welded to the end of the bolts so you need no tools in the field to secure the antenna mast. Photo credit: Tim Carter – W3ATB
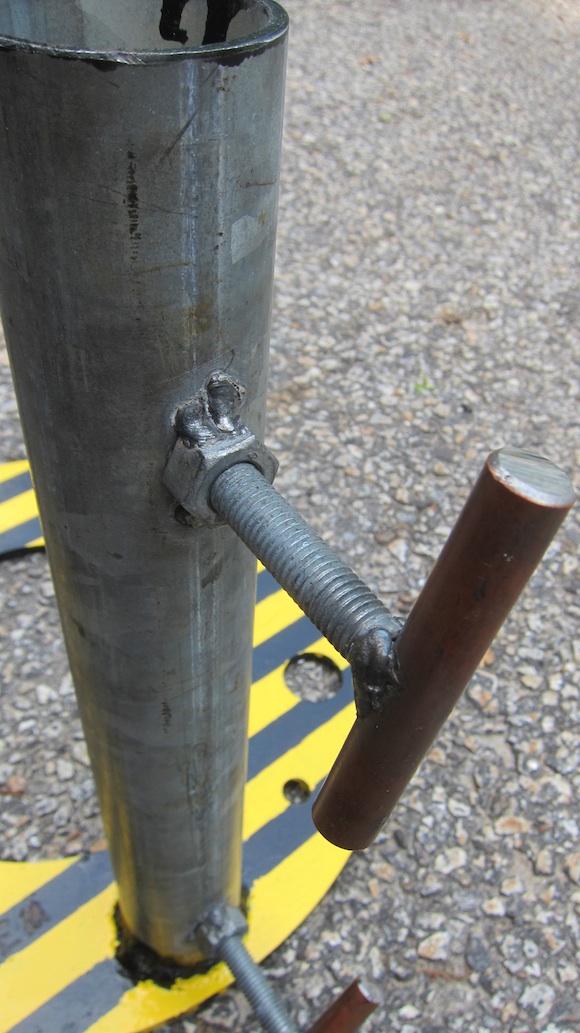
Here’s a close up of the bolt setup. You don’t want to tighten these too tight as the aluminum tubing is soft. You’re just trying to prevent movement. Photo credit: Tim Carter – W3ATB
Here’s the male end of the aluminum tubing. You can see the tab that interlocks with a notch on the female end. Photo credit: Tim Carter – W3ATB
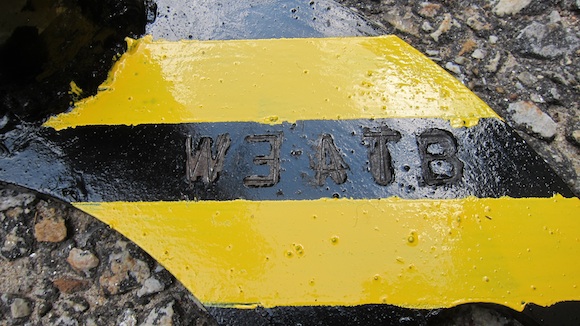
John Haven, KC1AAG, fabricated this mast support based on a design he and I collaborated on. He was able to stamp my call sign into the base! He had to use a letter “E” for the number 3. Photo credit: Tim Carter – W3ATB
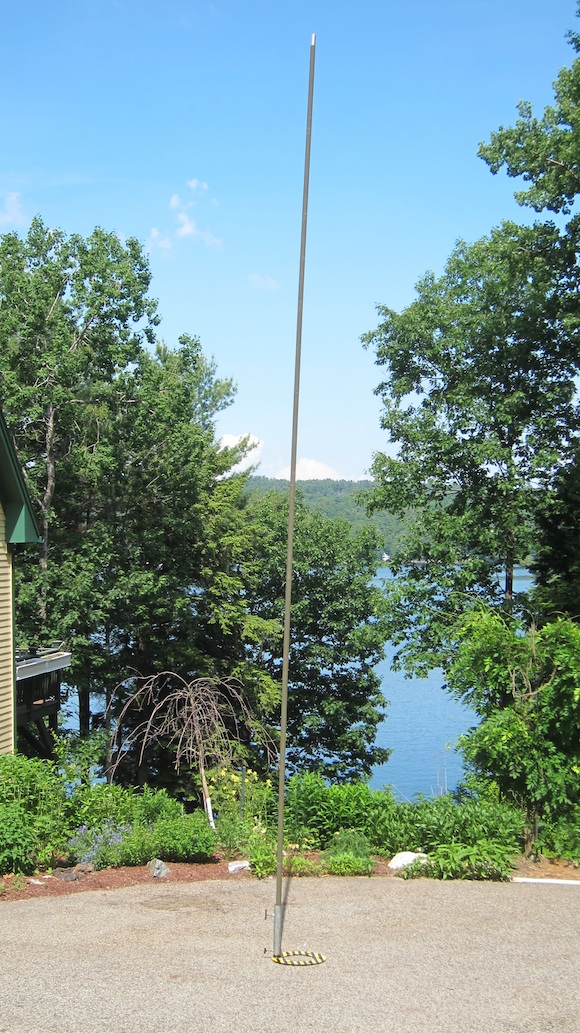
Here’s the mast up without my truck parked on the base. There was no wind, so it was safe to put this up for the photo. The tubing you see here is 25 feet tall. If you go any taller, you should stabilize the mast with guy wires. If you operate where it’s windy, you should probably attach guy wires to a mast this tall. Photo credit: Tim Carter – W3ATB